Sunday, November 16, 2014

One Way to Study General Conference Talks

The author of the blog, "Things As They Really Are," shares her method of studying General Conference talks.

How I Study General Conference

 
My conference editions of the Ensign used to get pretty worn. This summer I attended Education Week at BYU-Idaho and learned this trick from an instructor. Take the Ensign to a store like Office Max or Staples and have them do two things: 

1.  Spiral bind it. 
2.  Have them put a clear plastic cover on the front and a black cover on the back.
It's fairly cheep to do. Should be under five dollars.


Then I get to the meat of studying.  I pick topic's and assign them colors. This year was just three.
-When any talk tells us to read our scriptures.  (last year it was ALL over the place)
-When any of the talks give advice about raising families or anything in the vein of families 
-Marking any questions the speakers ask US!

In conferences past I've had put to five topic's to focus on and it can be anything you 
want really, but I pick the themes that are repeated over and over again. 


I treat them as I do my scriptures, because they are just that!  I mark them up. 
I always write/bullet point the main points of the talk. 
The one below says this: 
# Our own lives can be temple standard; no gritty walls or crooked/flawed windows. 
# Our "contractor" hold us to high standards.
# The Lord knows the level of our efforts and if we have done our personal best.

 
I write in the margin's, I circle words, and I even write my feelings sometimes. 
All of it just like I do with my scriptures. The picture does not show 
my completed study 
of this talk as it is now but here is what I wrote up:
* Moral issues addressed in families:
* Repentance only panacea 
* Unkindness 
* Sexual immorality
* Immersion in the scriptures
* Take any necessary action to feel the Spirit


I box whole paragraphs that I feel as super important. Along with the color makers I use a black marker.  This year it's a Paper Mate flair pen. Find the ones that don't smear. I used colored permanent markers that also don't smear. I haven't shown it here, but I also will circle the footnote numbers that I particularly liked. The footnotes make it SO like the scriptures. Being led by Jesus Christ through a prophet of God and His Twelve Apostles is wonderful. We get to hear from them twice a year. I always feel the Spirit and know what I need to do to make my life better. 

To learn more: Things As They Really Are

Sunday, October 26, 2014

New Scriptures

Since World War II the Church has provided members serving in the military their own set of scriptures to study and use. The old red-cover service-member scripture set had a unique pocket size that many people enjoy. Until now, the military edition of the scriptures has not been available to the public.

“For years missionaries, mission presidents, Scouts, campers, youth, youth leaders, commuters, and a variety of other members have been asking to purchase the pocket-sized military edition of the scriptures,” said Elder Larry R. Lawrence of the Seventy. “This set was only available to military personnel, but we did make the Book of Mormon available to the public in that size a number of years ago. Now we are making the latest edition of the whole set available to the public.”

To learn more: New Pocket Scripture Set Available to all Members

Thursday, October 23, 2014

Successful Family Home Evenings

“Raising a family is hard work,” said Darren E. Schmidt during a class at Campus Education Week at BYU. That is why time together as a family is critical to building testimonies and strengthening relationships. Brother Schmidt, a seminary instructor, shared principles and ideas to enhance family home evenings and scripture study, focusing on simple, practical elements for families to enhance their time together.

1. Be Consistent
“It doesn’t have to be perfect; just be consistent,” he said. For many parents, the phrase “quality over quantity” applies to family home evening, but there is a danger in that, said Brother Schmidt. It is a combination of quality and quantity that will be the most effective for a family. Although it is important to plan and prepare for family home evenings, consistency is a crucial factor. “It is a process and not a product,” he said. As family home evening becomes part of a family’s routine, children will expect their assignments and responsibilities and will look forward to the time together.

2. Be United
“Satan will wiggle his way in, so what we do is prepare for that,” Brother Schmidt said.
One way to deal with distractions and other things that get in the way is through unity. As a husband and wife are united, both spouses will take an active role in family home evening.
Brother Schmidt shared ideas of how to divide and conquer—one spouse is in charge of discipline and the other keeps the evening going. In single-parent homes, older children may be asked to help in a leadership role.

3. Make Family Home Evening Inspired and Purposeful
Families should aim to hold consistent, meaningful, Christ-centered family home evenings.
Family home evening is a place—other than church—where children are able to learn gospel . Sometimes the topics to teach are very clear, as parents have certain principles they would like to go over with their children. Other times parents have to “just pick the best thing,” said Brother Schmidt. When the family is prepared, the Spirit is able to teach. In those moments the Lord will often inspire parents to teach something that their child may have questions about or have a desire to learn more about. It is as parents are purposeful in their preparation that the Lord will be able to prepare the hearts of the learners.

4. Plan Ahead
Part of an effective family home evening is planning ahead. Through proper planning, parents are able to involve their children and help them prepare. Brother Schmidt spoke of the importance of every member having an assignment—no matter their age—every week. As the children are involved, they are able to prepare lessons and learn how to seek inspiration. By assigning the children things to do a few days before family home evening, they are able to work with their parents to prepare. A simple paper chart is a great way to rotate assignments and keep things organized.
5. Be a Shepherd, Not a Sheepherder
There is a difference between a shepherd and a sheepherder, Brother Schmidt said. “A shepherd knows his sheep, and the sheep know him,” Brother Schmidt said. “They can hear the voice of the shepherd and are reliant on him. They come when they hear him call.” A sheepherder may yell for the sheep to follow but have a hard time getting them to listen. Family life is busy, filled with activities—homework, soccer practice, piano lessons and practicing—so families are often rushed. A simple five- or ten-minute warning before family home evening—rather than yelling throughout the house—helps children to finish what they are doing so they are able to come to family home evening and fully participate. “A five-minute warning shows you are respectful of their time,” he said. “It is less forceful and creates an atmosphere with the Spirit.”

6. Everyone Must Play a Role
With an assignment given to each family member—even the younger children with help from their parents—participation becomes easier. When studying the scriptures, provide some form of scriptures for every person so all have their own something to hold and read. “For little kids cartoon books are good,” Brother Schmidt said. And when all have something to read, they are expected to participate and follow along. With that, asking inspired questions allows for deeper discussion and learning. When parents are prepared, they are able to follow the Spirit in extending invitations that encourage their children to act. Just as important as the inspired invitations is the follow-up on discussions and invitations. “Be purposeful in time and money,” Brother Schmidt taught. Sometimes it is a simple conversation that will make the biggest difference. Family home evening can be a time for families to set goals together—changing and adapting for each person as they get older—and a great place to reflect and be accountable for their goals.

7. Become Educated
With so many resources available to Church members today, parents have the opportunity to look to those resources for ideas for their lessons as well as answers to questions. Websites such as LDS.org, Church materials including the For the Strength of Youth pamphlet, and Mormon Messages are available to use within teaching and to help parents become educated. Resources for often-discussed topics are available for families to talk about and discuss, approaching sometimes difficult questions in a safe and gospel-centered environment. Children can ask questions and learn in their own homes, rather than through outside sources.

8. Use “the Word” Consistently
Just as important as it is to hold family home evening, it is important to spend time in the scriptures and focusing on Christ. Fun and games are good for families, but teaching children while they are young how to have a relationship with their Heavenly Father is the most important duty a parent has. As parents make a point to study together from the scriptures, they are able to teach and testify as they learn together. “Parents lead to the purest source of water,” said Brother Schmidt.

To learn more: 8 Tips for Successful, Effective Family Home Evenings

Wednesday, October 1, 2014

#ShareGoodness

Elder Bednar has urged us to flood the earth with goodness through the use of social media. To hear his message: #ShareGoodness

Here are some common questions.

How often should I post?
Sharing a raindrop of goodness does not mean you personally need to flood the earth. Your raindrop of shared goodness combined with everyone else’s will create that flood. You should never try to be that flood by yourself through massive amounts of communication. You will be exhausted and others will be annoyed. Better to be a welcome bit of sunshine than a blazing desert furnace.

How is communicating on social media different?
Social media is not a place you want to be perceived as being preachy or trying to “sell” something. It is like being inside someone’s personal space or home. If you annoy them or make them uncomfortable, they will remove you. They are more likely to be open to authentic, genuine thoughts and inspiration. Try to communicate in real, simple, and short ways. A picture with a word or two or a #(hashtag) can be enough. Think before you post. Part of this idea is to change the existing conversation out there into a more positive conversation. Show your goodness as you share your goodness, while being respectful of those you know well and those you don’t. The Golden Rule works well with social media too.

How can I use social media to share goodness?
Every time you post simple, genuine messages and links, you help lift and strengthen those who see them. Counter negative posts with positive ones. If a friend is down, say something to cheer them up. Post links to articles and videos that reflect your values. Highlight the good in every situation. Speak from the heart. Be yourself.

Saturday, September 27, 2014

Are We Prepared?

In the First Presidency message in the September 2014 Ensign, President Thomas S. Monson asks the question, "Are we prepared?"

I repeat what the First Presidency declared a few years ago:

“Latter-day Saints have been counseled for many years to prepare for adversity by having a little money set aside. Doing so adds immeasurably to security and well-being. Every family has a responsibility to provide for its own needs to the extent possible.

“We encourage you wherever you may live in the world to prepare for adversity by looking to the condition of your finances. We urge you to be modest in your expenditures; discipline yourselves in your purchases to avoid debt. Pay off debt as quickly as you can, and free yourselves from this bondage. Save a little money regularly to gradually build a financial reserve.”

To learn more: Are We Prepared?

Thursday, September 25, 2014

Dehydrating Food

Dehydration is an alternative to canning and freezing fruits and vegetables. If you have a surplus of fruits or vegetables from your garden, but lack the canning equipment or freezer space, drying may be the right method for you!

Dehydrated foods have a number of advantages: Dehydration is a low-cost way to preserve food that is free from concerns about botulism, the dried foods require less storage space than canned goods, and there's no freezer to keep running.

Dehydrating your own produce does require time and some knowledge of food drying principles.

To learn more: Food Dehydration at pickyourown.org

Monday, September 22, 2014

How to Preserve Herbs

Herbs All Year by Laurie Constintino

I’ve been growing tender herbs like basil, parsley, dill, chervil, cilantro, and chives for the past 25 years, and it’s taken me nearly that amount of time to find the best way to preserve their flavor long after I have harvested the last sprigs. These are just some of the techniques I’ve tried with disappointing results: drying (the herbs lost all their flavor); freezing (they lost their texture and got freezer burn); freezing in water in ice cube trays (I was left with a soggy, limp, and unappetizing mess).

Luckily, along the way I discovered that the best way to preserve herbs is to freeze them in oil or butter. And there’s a good reason for this: Each herb’s distinctive taste and aroma come from aromatic oils in the leaves, so preserving them in fat protects their authentic flavors. Packed in flat, thin layers in heavy-duty zip-top bags, frozen herb butters and oils are easy to store. I put a half-cup or so in a bag, freeze it flat, and end up with a thin layer of frozen goodness, which can be broken off into pieces as needed.

I use herbs preserved in oil the same way I use fresh herbs. They are particularly good in soups, stews, and salad dressings, where their vivid flavors can transform an ordinary dish into a spectacular one.

Herb butters are even more versatile. I use them in sandwiches, pasta, seafood, meat, poultry, popcorn—anything that tastes good with butter and herbs will benefit. I even replace plain butter with herb butter when making cakes and cookies.

Spend just an hour whizzing up a few batches of herb oils and butter, and you’ll be rewarded all winter long with vibrant flavors and delicious meals. Not to mention fond memories of your summertime herb garden.

How to Preserve Fresh Herbs in Oil or Butter

* Wash herbs, discarding stems and damaged leaves. Spin leaves dry in a salad spinner or dry well with paper towels.
* Place herbs in food processor with 1/3 cup olive oil for every 2 cups leaves, or 1/2 cup unsalted butter (1 stick) per 2 to 4 tablespoons leaves.
* For butters, add grated citrus rind, ginger, or garlic for extra flavor.
* To make sure herb oils are adaptable to a wide variety of uses, don’t add cheese or nuts.
* Pulse processor, scraping down sides of bowl from time to time, until you get a chunky paste and all leaves are chopped.
* To package for freezing, put 1 cup herb oil or 1/2 cup herb butter in a 1-quart zip-top bag, then flatten and spread mixture to make a thin layer. Freeze flat.
* Best used within 6 months.

To learn more: Organic Gardening

Saturday, September 20, 2014

Freezing Corn on the Cob

Ingredients:
10 corn on the cob, shucked and silks removed
Water
2 tablespoons sugar
Ice (lots of ice)

Directions:
1.    Have all you cobs of corn shucked and silks removed before starting this.
2.    Pour ice into a large bowl then fill with very cold water; set aside on the counter near your stove.
3.    Fill a large pot of water a little over half full.
4.    Add in the sugar; bring to a full boil.
5.    Add in as many cobs of corn that will fit into the pot without over crowding.
6.    Bring the water up to a FULL boil again; cook the corn JUST until the cobs turn a darker yellow which will not take long (about 3 minutes) turning the cobs over in the water if necessary using long tongs to insure even cooking.
7.    Just when the corn takes on a darker shade of yellow, using long tongs immediately plunge into the bowl of ice water and allow to sit until completely cooled.
8.    Place the cobs onto a clean tea towel. to drain slightly.
9.    Dry the outside of each cob slightly with a clean tea towel.
10.  Wrap each cob individually in a piece of foil to prevent any freezer burn that might develop over the long freezing time.
11.  Place the foil-wrapped cobs in a large bag, then freeze.
12.  WHEN READY TO USE; remove as many cobs as you wish from the freezer place on the counter to thaw slightly (the corn does not have to be completely thawed).
13.   To heat the corn; place 1 cob into a microwave-safe plate and cook on high for 3-4 minutes or until completely heated through, turning the cob halfway through cooking time.
14.   The corn is now ready to eat and enjoy!

To learn more: food.com - freezing corn on the cob

Thursday, September 18, 2014

How Does a Pressure Canner Work?

Modern pressure canners are lightweight, thin-walled aluminum or stainless steel kettles. Most have twist-on lids fitted with gaskets. There are still one or two that have screw-down knobs around the lid on the canner. They have removable racks, a weighted vent port (steam vent), and a safety vent. They also have either  a dial gauge for indicating the pressure or a weighted gauge (which both regulates the pressure and indicates, by rattling). Pressure canners can usually handle either one layer of quart or smaller size jars, or deep enough for two layers of pint or smaller size jars.

Unlike a water bath canner, the jars do not need to be completely covered with water. The directions that came with the pressure canner tell you how many cups of water to add in order for it to generate the right amount of pressure. You vent the pressure canner a considerable length of time while the water boils (with the jars in and the lid on). This causes steam to push out all the air. So the jars are in a space filled with only boiling water and steam. In theory, both will have the same temperature, which will be 240 F, substantially high than 212 F of an open water bath canner, due to the increased pressure. And since there is no air, just water vapor, the heat will be easily conducted to all sides of the jars.

If you want to can low-acid foods such as red meats, sea food, poultry, milk, and all fresh vegetables with the exception of most tomatoes,  you will need a pressure canners.  These foods  fit into the low acid group since they have an acidity, or pH level, of 4.6 or greater. The temperature which must be reached and maintained (for a specified amount of time) to kill the bacteria is 240 F. Pressure canning is the only canning method recommended safe by the U.S.D.A. for low-acid foods such as vegetables, meats, and fish. Ordinary water bath canners can only reach 212 F and cannot to kill the types of bacteria that will grow in low acid foods. This temperature can be reached only by creating steam under pressure as achieved in quality pressure canners.

To learn more: Pressure Canners at pickyourown.org

Tuesday, September 16, 2014

Caramel-Pear Butter

Caramel-Pear Butter
recipe from epicurious.com

1/4 cup apple juice
6 tablespoons fresh lemon juice, divided
7 pounds ripe Bartlett pears
3 cups (packed) golden brown sugar
1 teaspoon freshly ground nutmeg
3/4 teaspoon coarse kosher salt
preparation

Combine apple juice and 4 tablespoons lemon juice in heavy large deep pot. Peel, core, and cut pears, 1 at a time, into 1/2- to 3/4-inch pieces; mix pears into juice mixture in pot as soon as pears are cut, to prevent browning. Cook over medium heat until pears release enough juice for mixture to boil, stirring frequently, about 16 minutes. Reduce heat to medium-low; cover and simmer until pears are very tender, stirring frequently, about 20 minutes (mixture will splatter). Remove pot from heat. Press pear mixture through fine plate of food mill into large bowl. Return pear puree to same pot. Add 2 tablespoons lemon juice, brown sugar, nutmeg, and 3/4 teaspoon coarse salt. Bring to boil over medium heat, stirring until sugar dissolves. Reduce heat to medium-low and simmer uncovered until pear butter thickens and is reduced to 8 cups, stirring every 5 minutes to prevent scorching, about 1 hour.

Ladle pear butter into 8 hot clean 1/2-pint glass canning jars, leaving 1/4-inch space at top of jars. Remove air bubbles. Wipe jar threads and rims with clean damp cloth. Cover with hot lids; apply screw bands. Process jars in pot of boiling water 10 minutes. Cool completely. Store in cool dark place up to 1 year.

To learn more: epicurious.com

Sunday, September 14, 2014

ONE Challenge


The ONE Challenge - One Name Each - given to us by our Stake Presidency during Ward Conferences is quickly coming to an end. Have you been successful in finding your ONE name to take to the temple? If not, check out the website below for some links to help you along.

To learn more: Find Family Names

Saturday, September 13, 2014

Freezing Zucchini

Mick Telkamp from HGTV Gardens says, "For the home gardener, zucchini is often a first round pick when planning the summer garden. With good reason. Easy to grow and with a long growing season, zucchini is an easy home run when looking to fill the gathering basket.

And fill it you will. Harvest begins in early summer and does not let up until summer is over. Depending on your growing zone, that can mean a whole lot of zucchini.

Zucchini bread, sauteed zucchini, grilled zucchini, zucchini muffins, marinated zucchini salad, zucchini pancakes, zucchini fries, zucchini lasagna, zucchini frittata, zucchini pizza, zucchini quiche, zucchini in zucchini sauce, zucchini stuffed zucchini, zucchini zucchini…

By mid-summer, the ideas have run out. Bags of zucchini begin to appear in the office break room or are left on your front porch as other intrepid gardeners also face zucchini burnout, desperate to clear the counter before the only choice is the compost pile.

Sure, you’re sick of them too. But take them all. Every last one. Don’t worry. We have a plan.

Believe it or not, there will come a day when a zucchini muffin is going to sound pretty good. Added to a hearty winter soup, that zucchini heft and flavor might be just the ticket. And we’ll be ready.

Zucchini (and summer squash, for that matter) freezes well. With a little preparation up front, zucchini and squash can become a welcome “go to” for fall and winter cooking."

To learn more: How to Freeze Zucchini


Thursday, September 11, 2014

Freezing Raw Tomatoes

Tired of canning? Did you know you can freeze raw tomatoes? The UNL (University of Nebraska) food website explains the procedure.

It is possible to quickly freeze raw tomatoes without blanching them first. They may be frozen without their skins or frozen whole with their skins. Frozen tomatoes are best used in cooked foods such as soups, sauces and stews as they become mushy when they're thawed. Roma tomatoes are ideal to freeze. They have fewer sides, thicker, meatier walls, and less water.

Tomatoes may be frozen whole, sliced, chopped, or puréed. Additionally, you can freeze them raw or cooked, as juice or sauce, or prepared in the recipe of your choice. Thawed raw tomatoes may be used in any cooked-tomato recipe. Do not try to substitute them for fresh tomatoes, however, since freezing causes their texture to become mushy.

Tomatoes should be seasoned just before serving rather than before freezing; freezing may either strengthen or weaken seasonings such as garlic, onion, and herbs.

Step 1. Preparation and Selection

Select firm, ripe tomatoes for freezing. Sort the tomatoes, discarding any that are spoiled.

Step 2. Wash Tomatoes

Tomatoes should be washed before cutting. To wash, wet each tomato with water, rub its surface, rinse it with running water, and dry it with a paper towel. After washing, cut away the stem scar and surrounding area and discard it before slicing or chopping the tomato.

Washing tomatoes in a sink filled with water is not recommended since contaminated water can be absorbed through the fruit's stem scar. The use of soap or detergent is neither recommended nor approved for washing fruits and vegetables because they can absorb detergent residues.

Dry them by blotting with a clean cloth or paper towels.

Step 3.

Freezing whole tomatoes with peels: Prepare tomatoes as described above. Cut away the stem scar. Place the tomatoes on cookie sheets and freeze. Tomatoes do not need to be blanched before freezing. Once frozen, transfer the tomatoes from the cookie sheets into freezer bags or other containers. Seal tightly. To use the frozen tomatoes, remove them from the freezer a few at a time or all at once. To peel, just run a frozen tomato under warm water in the kitchen sink. Its skin will slip off easily.

Freezing peeled tomatoes: If you prefer to freeze peeled tomatoes, you can wash the tomatoes and then dip them in boiling water for about 1 minute or until the skins split. Peel and then freeze as noted above.

To learn more: UNL Food - Freezing Raw Tomatoes

Thursday, July 3, 2014

Water Play Fun Ideas

This mom has collected all in one place lots and lots of fun water play ideas. Check it out and stay cool! To learn more: Water Play Fun Ideas

Wednesday, July 2, 2014

Kickin' it Croquet Style

Kids need to burn off some of that extra energy? Have some old pool noodles on-hand?? Then it’s time to make up your own kick croquet lawn game!!

To learn more: Kickin' it Croquet Style

Monday, June 30, 2014

Teach Your Family About the 4th of July

Simple explanations about the 4th of July that children can understand. There are also pictures with each explanation. What a great FHE idea!

To learn more: Meaning of the 4th of July

Sunday, June 29, 2014

Seven Important Thing to Say to Kids

1.  I trust you.
2.  You tried and that is important.
3.  You always _______. (smile, help others, etc.)
4.  How can I help?
5.  Parents have rules too.
6.  Tell me more.
7.  Great question!

Bonus:  The MOST important thing you can say to your child is:  
I LOVE YOU!

Saturday, June 28, 2014

Photo Scavenger Hunt for Kids

Tired of being the one in charge of the camera every single vacation and outing? Here's a great idea to share the responsibility and capture more memories.

To learn more: Photo Scavenger Hunt for Kids


Saturday, June 21, 2014

Sponge Balls

Do you love water balloon fights but hat the mess. Here is a great alternative!


To learn more: The Great Water Balloon Alternative

Wednesday, June 18, 2014

Some of the Best Water Balloon Games

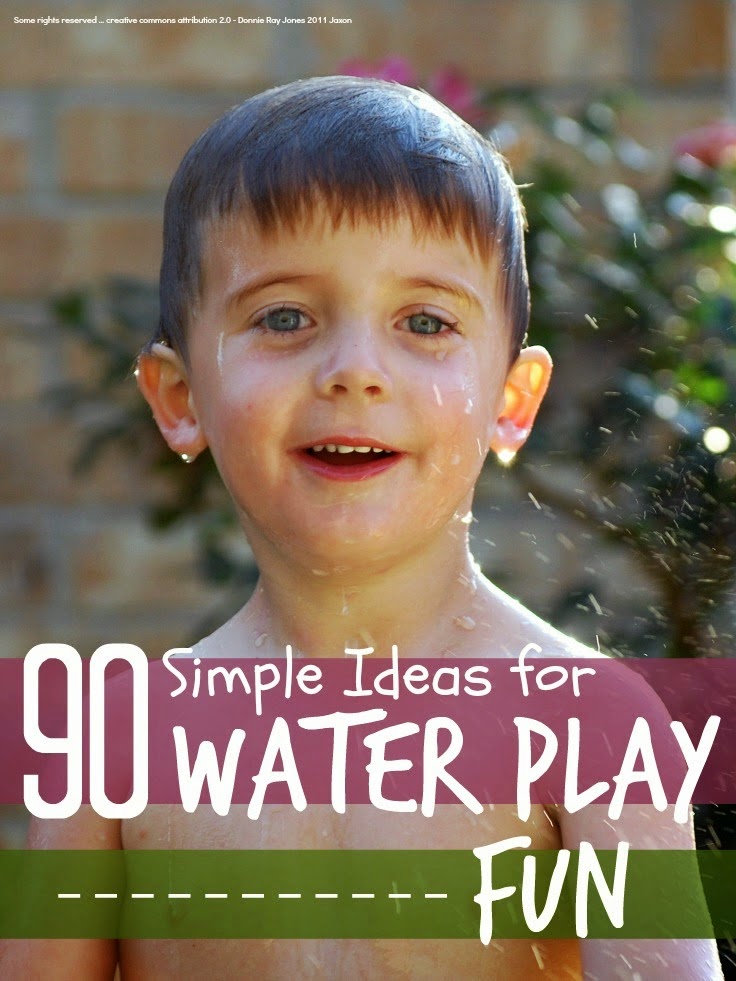
Hot and bored? That problem can be solved with some water balloon games. The following ideas came from: 20+ of the Best Water Balloon Games

After searching high and low for some of the best water balloon games, here are my top picks:

1) The water balloon version of Hot Potato is a great twist on the original. Get the kids to sit in a circle and start passing around a water balloon.  Start playing some music and then, at random intervals, turn off the music.  Whomever is left holding the water balloon or whoever pops it is the one out. The last child left in the game is the winner.

2) Paint with Water Balloons - My kids and I have used balloons for painting and the results were absolutely beautiful. Our balloons were filled with air, but adding weight and movement with water balloons is a completely new sensory experience for kids, and you'll be surprised at how beautiful the results can be.

3) Water Balloon Number Target Practice - Combine number recognition review and water balloons for a fun, easy and educational summer game. Read more at Mom to 2 Posh Lil Divas

4) Balloon Roll - For this game, you have to keep your water balloon on the ground.  The child that rolls their water balloon the farthest, and does not pop it, wins!

5) Nothing is better on a hot summer day than Water Balloon Dodge Ball.  Last week, my boys decided that I was the going to play this game with them, even if I was fully dressed.  There are too many serious moments in life, so letting your kids hit you with water balloons can be really fun. If you have a group of older kids, you can really get an organized game of dodge ball going.  First, make sure you have a lot of water balloons and a bunch of kids. Separate the kids into teams and then, let the kids go at it! If you get hit by an opposing team member, you're out.

6) For older kids and teens, Water Balloon Darts can be a fun activity. Just prop up the balloons on a target, give each one a value (20 points, 40, points, 60, points, 80 points and 100 points.) See who can accumulate the most points for each balloon they hit.

7) Angry Bird Inspired Water Balloon Game - "Inspired by the mega popular video game Angry Birds this takes the game outside into the sun for fun all summer long." Read more at No Time for Flash Cards

8) Water Balloon Relay Race - Set out one chair for each team and place a water balloon in the seat. Then, players take turns running to the chair, and sitting on the balloon till it pops. After they pop the balloon, they run and tag the next player. (You will need to put a new balloon in after each one is popped.) The first team to pop all their balloons and cross the finish line wins.

9) Water Balloon Sight Word Toss - It's really simple to help reinforce sight words while playing a water balloon toss game. Learn more at Royal Baloo

10) Water Balloon Pinatas - Hang balloons from your monkey bars or clothes line. Let the kids take turns hitting the "pinatas."

11) How Far Can You Go? See who can throw their water balloon the farthest.  The kid who gets their's the farthest WITHOUT POPPING it, wins!

12) The Water Balloon Challenge is a water game for youth groups – one that’s designed to make a big splash!

13) Keep the music rolling and you can also play a fun game of Musical Water Balloons. Just like musical chairs, you will need 1 less water balloon each round (for instance, 5 players = 4 water balloons). Gently lay the balloons on the grass. Start playing some music and then have the kids walk in a circular motion.  At random intervals, turn off the music. When the music stops, the kids need to find a ballon and sit on it.  Whomever is left without a water balloon to sit on is out. The last child left in the game is the winner.

14) Splash and Score Baseball -  Kids can test their aim and douse their opponent at the same time with this water balloon game of throwing and blocking skills.

15) Water Balloon Spoon Races - Use a plastic serving spoon or a wooden spoon for this simple summer game.

16) Fill the Bucket - This is a great team game perfect for a kid's group or camp.  Each team uses water balloons to fill up a bucket.  Whichever team fills the bucket first wins!

17) Water Balloon YoYo - Cut a rubberband in half.  Then, attach the rubber band to the water balloon.  The kids have to yo-yo them up and down until the last one with their balloon intact wins!

18) Water Balloon Tag - Whomever is “it” carries the water balloon. If you get hit and the balloon breaks then, “Tag you’re it!"

19) Even preschoolers can have fun filling up the water balloons. So, this game idea is simple.  Just let the kids try to fill up the water balloons with the hose.  Whoever can make the biggest balloon without it popping it is the winner!

20) Water Balloon Obstacle Course

21) Pop the Sharks - Draw a simple shark face on about 10 water balloons. Then, fill a kiddie pool with water and add the balloons. Give each child 15 seconds in the pool, and whoever pops the most sharks wins.

22) If you have 8 or more kids, find two sheets or table cloths for a Group Catapult.  Have each child hold a corner (4 kids per sheet). Then, throw a water balloon onto the first sheet and have the 1st team try to propel it over to the 2nd teams table cloth. This video shows how it's done.

23) And, finally....everyone loves a good old fashioned Water Balloon Toss.  Everyone line up and stand across from your partner.  Everyone takes turns tossing the balloon to their partner.  The last team to pop their balloon wins!

Monday, June 16, 2014

14 Super Cool Things to do with Crayons

When you think of crayons do you automatically want to grab a coloring book? Of course crayons are wonderful for coloring but that is not all they can be used for! These creative parents have come up with some really neat things to do with crayons. 14 Super Cool Things to do with Crayons Crayon Stained Glass - Nessa Dee Art Melting Crayon Art on Canvas Water Color Resist  - The Artful Parent Window Roadway - No Time for Flash Cards Crayon Monograms - A Mom with a Lesson Plan Sight Word Crayon Rubbing - Sugar Aunts Sun Upcycled Crayons - Mama Smiles Sun Melting

Sunday, June 15, 2014

Summer Reading .... Library Tour

This is such a fun way to learn about our local library. It even includes a free printable. What a great idea for a hot summer day!


To learn more: Library Tour


Saturday, June 14, 2014

100 Free Things to Do


Looking for something to do? Check out this fabulous website for some great ideas and start your memory making today.

To learn more: 100 Free Things to Do

Friday, June 13, 2014

Get Along Jar

Summertime can be stressful with everyone home and sometimes getting along is hard to do. This family has a great idea that can be adapted to fit your own family.


To learn more: Get Along Jar

Thursday, June 12, 2014

Summer Fun in Utah

Check out this website for ideas to do this summer in our great state of Utah!
To learn more: Summer Fun in Utah


Tuesday, June 10, 2014

Spaghetti Slime

How fun does this look for an afternoon activity?

You will need:
* Kool-Aid or Food Coloring
* 1 Box of Spaghetti
* Oil  {You can use Vegetable Oil, Coconut Oil, or any oil of your choice}
* Water

1. Divide 1 box of spaghetti in three parts.

2. Put 4 to 5 cups of water in a pot and add one packet of Kool-Aid of your choice and bring it to boil.

The spaghetti will turn the color of the Kool Aid… Have fun choosing!

{You can use Food Coloring instead of Kool-Aid if you want}

3. When the water is boiling cook one portion of the spaghetti in it.
When the spaghetti is cooked it will turn the color of the water.

4. Drain the cooked spaghetti…

5. Drain the spaghetti once again and add about one tablespoon of oil.

{Repeat these steps for each color}

You are done and it’s time to play!

To learn more: The 36th Avenue

Monday, June 9, 2014

Happiness in Family Life

Happiness in family life is most likely to be achieved when founded upon the teachings of the Lord Jesus Christ. Successful marriages and families are established and maintained on principles of faith, prayer, repentance, forgiveness, respect, love, compassion, work, and wholesome recreational activities.”
~ The Family: A Proclamation to the World ~

Monday, June 2, 2014

Nine Lessons for FHE on "The Family: A Proclamation to the World"

Get great Family Home Evening lessons for the next nine weeks! This FHE series, based on the First Presidency's "The Family: A Proclamation to the World," will teach your family the best principles on which to base their life.

LDS Living - Nine Lessons on "The Family: A Proclamation to the World"

Sunday, June 1, 2014

Today's Family: Proclamation Still a Clarion Call

“The Family: A Proclamation to the World” remains “a clarion call to protect and strengthen families,” according to Elder M. Russell Ballard of the Quorum of the Twelve Apostles, who says it is also “a stern warning in a world where declining values and misplaced priorities threaten to destroy society by undermining its basic unit.”

Doctrines outlined in the proclamation apply as much or more today as they did in 1995 when the First Presidency and the Quorum of the Twelve Apostles issued the document, which proclaims to the world the importance of the family."

To read entire article: Today's Family: Proclamation Still a Clarion Call

Tuesday, May 27, 2014

Counting the Hours Until School is Out?

"Celebrating the end of school together as a family is such a great way to create lasting memories. The last day of school is the perfect opportunity to start a new tradition that your kids can look forward to year after year. Here are 20 creative ways to celebrate the end of school, especially the last day of school with your kids from Angie Lee."

To learn more: 20 End of School Celebrations and Traditions


Friday, May 23, 2014

Celebrating Memorial Day

"Memorial Day weekend is the unofficial kickoff of summer. It's also a time when family and friends get together for picnics and backyard barbecues. However, this holiday is more than just fun and games."
"When your kids ask, "What is Memorial Day?" be prepared to give them the proper answer. Originally called Decoration Day, Memorial Day is a day of remembrance for those who have lost their lives in our nation's service. Though some form of Memorial Day has been celebrated in various areas of the country beforehand, Memorial Day was officially proclaimed by General John Logan on May 5, 1868 and was observed later that month on May 30 when flowers were placed on the graves of both Union and Confederate soldiers who were buried at Arlington Cemetery."

Thursday, May 22, 2014

Family Friendly Hikes Near Salt Lake City

"Hiking is a wonderful family activity, but not all hiking trails are wonderful for families. A good hiking trail for mixed family groups including young children or seniors should be short (under 3 miles or so) and not too steep. It should also feature some interesting attraction - such as a lake or waterfall - so children will feel they're going somewhere and not just trudging pointlessly through the woods. Here's a list of great family hikes in the Salt Lake City area, any of which can make for a memorable and affordable family outing."

To learn more: About.com - Salt Lake City

Tuesday, May 20, 2014

Summer Journal Ideas


Kids can celebrate summer better than anyone else! What about creating a keepsake to remember how much fun summer was? As an added bonus it will help with writing skills over summer vacation.

For children that can write there are some great ideas at Fun Ways to Improve Writing Skills

Here is a cute idea for toddler journals. Check out her ideas at Teach Your Tot Blogspot.


Sunday, May 18, 2014

How to Find Happiness in Family Life

Happiness in Family Life

is most likely to be achieved when founded upon the teachings of the Lord Jesus Christ. Successful marriages and families are established and maintained on principles of faith, prayer, repentance, forgiveness, respect, love, compassion, work, and wholesome recreational activities.”

~ The Family: A Proclamation to the World ~

To learn more: Happiness in Family Life

Friday, May 16, 2014

Matt Townsend Fireside

Stake Adult Fireside
Date:  Sunday, May 18th
Time:  7:00 p.m.
Place:  Stake Center Chapel

Dr. Matt Townsend is the founder of the 
Townsend Relationship Center, 
a relationship, skills-building organization.  
Through entertainment and humor, Matt teaches life-changing skills 
that can help us improve our most important relationships. 
Everyone is involved in a relationship - 
spouse, child, parent, sibling, friend, etc. 
This topic has something for everyone!

Wednesday, May 14, 2014

Family Summer Bucket List

"Mom I'm bored." 
"This is stupid."
"There is nothing to do."

Do you any of the above statements sound all too familiar? If so, why not start a new tradition and create a Summer Bucket List. The first step to any bucket list is to gather ideas from the family about what fun things they want to do this summer. 

There are lots of different ideas of what to add to your bucket list and how to present it online. Just goggle Summer Bucket Lists

Check out this website for a fun idea: Our Summer Bucket List  


Monday, May 12, 2014

Provident Living emphasis for May/June 2014

In May, Ward Provident Living Specialists will be receiving information about Family Relationships and Family Fun to present to their respective wards. Various blog posts will address this subject throughout May and June of 2014.

The family is central to the Creator's plan for the eternal destiny of His children. The living prophets tell us why.

To learn more: The Family: A Proclamation to the World

Wednesday, April 30, 2014

Red Butte Vegetable Container Workshop

Do you lack sufficient sun or garden space for a vegetable or herb garden? Many herbs and vegetables thrive in containers, which can be positioned or moved to take advantage of sunny spots.

Red Butte Garden is offering a Container Gardening Workshop. Registration and fee are required. Learn which vegetables and herbs do well in containers, as well as tricks to keep them producing throughout summer and into fall. You will also have the opportunity to plant the vegetables of your choice into a 15-inch container for take-home enjoyment.

To learn more: Red Butte Garden

Saturday, April 26, 2014

Time to Tame the Raspberry Jungle

"Raspberry pruning is a stickery job,and the instructions in the books seem so confusing. But a lack of pruning leads to tangled, unproductive, disease-prone raspberry jungles. When your worst winter weather subsides, you can tame your raspberry jungle and turn it back into a respectable patch."

To learn more: Read Sally G. Miller's article Dave's Garden

Thursday, April 24, 2014

Design, Irrigation, Planting and Maintenance of Landscapes

At the Conservation Garden Park Website you can find the step-by-step learning exhibits in each themed path to help you through the design, irrigation, planting and maintenance of your landscape.


Tuesday, April 22, 2014

What to plant?

Have you ever wondered what plants grow best in Northern Utah? Which plants are water-wise? The Conservation Garden Park has the answers.

"Our plant database has over 800 plants that can be found throughout the Garden. Plants can be searched by common plant names, botanical names, and other attributes. The plants are ideal for northern Utah and many of them can be used for xeriscaping and other waterwise landscapes."

To learn more: Find Plants

You can also view examples of different landscapes.

To learn more: Example Landscapes

Sunday, April 20, 2014

Growing Relationships - Part #3

Gardens create places of natural beauty and offer opportunities for strengthening friendships and teaching our children the law of the harvest. Growing a garden can help us become more self-reliant. But in the following accounts, three members describe blessings they have received from gardening that go beyond food—blessings that have enriched their relationships with family, Church members, and friends.

A Place for Beauty
Sarah Fulton, California, USA

My parents taught my six siblings and me the importance of growing our own food and beautifying our surroundings. Wherever I live, growing a garden and creating beauty in my environment are things that bring me a most satisfying kind of joy.

In 2004 I moved to Africa for two years and attended a ward that had a few acres of undeveloped landscape as part of the property. As a ward, we turned that land into 20 smaller plots for families to grow their own vegetables. The garden was a blessing in my life and the lives of the members because we were able to supplement the food we purchased with food from the garden.

A few years later, my sister and I lived together in Brooklyn, New York, USA. With some faith, we found an apartment to rent with a backyard that needed to be developed. With time and a lot of help from friends, the backyard became an oasis in the city. As much as I love growing my own food, I’ve realized that creating a space of beauty to share with others has brought the greatest satisfaction. Our garden was a place where people could come to relax, enjoy the peace and quiet, and remove themselves from the noise and hustle of the city. I’m reminded of what President Dieter F. Uchtdorf, Second Counselor in the First Presidency, taught the Relief Society: “As you take the normal opportunities of your daily life and create something of beauty and helpfulness, you improve not only the world around you but also the world within you.”

Growing Relationships

Monday, April 14, 2014

Tomatoes

Tomatoes are a warm season vegetable that prefers sunny locations and fertile, well-drained soil. For more information on tomatoes, click here.

VARIETIES: Tomatoes can be categorized by maturity class (early, midseason or late), fruit size (cherry, pear, plum or large), plant size (determinate, semi-determinate or indeterminate), fruit color (red, pink yellow or orange), or use (fresh, process or dual use).  Most varieties will grow well in Utah but not all are available.

CULTIVATION:

Soil Preparation:  Before planting, incorporate 2 to 4 inches of well-composted organic matter and apply 4 to 6 cups of all purpose fertilizer per 100 square feet.  For more information on soil preparation, click here.

Planting:  Plant tomato seeds 4 to 6 inches apart, ½ deep in the soil, and 18 inches apart in the row. After the seedlings have two leaves, thin to one to two plants per clump. Tomatoes should be planted once soil temperatures reach 60°F or when frost danger has passed.

Irrigation: Water tomatoes deeply and infrequently while trying to maintain even soil moisture. About 1 to 2 inches of water are required per week.  Use drip irrigation, if possible, to conserve water.  Applying mulch around the plant also helps conserve soil moisture and reduces weed growth.  Moisture fluctuations can cause blossom-end rot.  For more information on watering, click here.

Fertilization:  Avoid heavy fertilization with tomatoes, which encourages excessive foliage growth and delays fruit maturity.  Side dress tomato plants with a nitrogen fertilizer, using ½ tablespoon per plant at four and eight weeks after transplanting.  For more information on fertilizing, click here.

Harvest:  Tomato fruits require 25 to 35 days to mature from flowering, depending on the temperature and variety.  Pick fruits when they are fully colored, but firm for the best flavor and quality.  At the end of the season, harvest all fruits that are mature, green or colored slightly.    

COMMON PESTS AND DISEASES: Aphids, cabbage worms, loopers and wilt diseases are common pests of tomatoes.  Appropriate insecticides at seeding or strong water streams are both effective ways to control these pests.  For more information on controlling pests and diseases, click here.

To learn more: USU Extension Service

Thursday, April 10, 2014

How to Design a Flower Container Garden

Gardening with containers allows you the opportunity to experiment with color combinations and plant choices before committing to those plants in the garden. There are many ways to plant containers, and that can be quite intimidating, especially for beginners.

Combine Various Plants
The easiest way to begin is to combine these categories of plants: thriller, filler and spiller.
"You want to have a bold, upright, architectural plant; that's the thriller," says garden designer Steve Silk. "It really gets your attention."

The filler is the plant with medium height in the pot, or the next step down from the thriller. The spiller tumbles out of the edge of the container and falls toward the ground.

When considering plants to use as your thrillers, fillers and spillers, think about their texture, fragrance and color combinations. Individually, each plant conveys color, texture, shape, and dazzle. Yet when combined in one container or a grouping of pots, examine how the plants interact with each other. Do certain colors in one plant bring out subtle complementary colors in another? How do the various leaf shapes, sizes and textures carry through the container plantings? Is there an underlying theme that connects all the plants together?

Choose a Thriller
So how do you combine form and function into a fabulous container? Start with your focal point, or thriller. This is the plant that provides architectural structure in the pot. "Thrillers are the big, bold element, so look for shapes that are strong and pronounced," says Steve. Good options for thrillers are bananas, elephant ears, cannas and ornamental grasses.

Choose a Filler
Fillers are the plants in the middle that connect the thrillers to the spillers. "Fillers are mounding, billowy plants that I like to put around the thriller. They disguise the base of the thriller and fill up the pot with neat shapes," says Steve. Consider using plants of moderate size, such as coleus, pentas and lantana.

Choose a Spiller
Spillers are the final element to consider when designing your pots. They cascade to the ground, softening the edges of the pot and anchoring it in place. They provide a colorful skirt around the combination of thrillers and fillers. Sweet potato vine, million bells (Calibrachoa) and verbena are good examples of trailing plants.

Select a Container
Before selecting a container, think about where you want to put it in the landscape. Will it soften the corner of a patio? Do you want to place it within a grouping of containers? These are important options to consider when choosing a pot and will help to determine if you need small eight-inch pots or big four-foot containers. You should also consider color combinations, formal vs. informal, style, access to a water source, general care and maintenance, and plans for winter care.

Plant Your Container
Good soil is vital in containers. Steve recommends using a mixture of one part high-quality potting soil, one part compost and one part shredded pine bark.

Once the soil is in place, start planting the container. You can assemble the container in any way you see fit, but it's helpful to plant the biggest plant, the thriller, first so you don't have to make room for it later. Then add the fillers around the base of the thriller, followed by the spillers trailing over the edge of the pots.

As you arrange the plants in the pot, symmetry isn't essential, but picking up color echoes to tie the plants together is always nice. The thrillers, fillers and spillers concept works the same for small and large pots as well as pots clustered together in groupings.

Water the pots as needed and feed with a liquid or slow-release fertilizer every two to three weeks.

To learn more (and see photos): How to Design a Container Garden

Monday, April 7, 2014

Contain Yourself! Growing Vegetable Gardens in Pots.

By Emily Hodgson-Soule And Helen Hodgson | For The Salt Lake Tribune

Using containers can save time and space.

As city dwellers, we never seem to have enough of two things: space and time. So when the growing season beckons, what’s a busy urban gardener to do? Growing edible crops in pots may be the answer.


Planting in containers is a relatively easy task, and one that affords a lot of freedom and flexibility, especially when compared with the hours it takes to prepare and plant a traditional garden plot.

Choosing the right location for a traditional garden is critical, but with container gardening, "you can have your garden adapt to you," says Nathan Gerber, an advanced master gardener based out of the Utah State University Extension Office at Thanksgiving Point.

Carving out a plot that provides vegetables with a minimum of six to eight hours of daily sunshine may be a challenge, but if the location of your container garden isn’t perfect, all you have to do is move the pots.

What you need » In its simplest form, growing a successful container garden requires only six things: seeds or starts, suitable containers, consistent moisture, container soil, regular fertilization and full sun. Given these basic necessities, vegetables that are traditionally grown in the ground can be grown in pots instead, with few exceptions. And your choices aren’t restricted to "bush," "compact" or "determinate" vegetables, either. Although these varieties have been bred specifically to grow well in small spaces, full-size vegetables will also thrive in pots as long as they are treated well.

Just about anything can house a vegetable, but the containers you use must be able to sustain the crops you plant: asking a full-size tomato to bear fruit while living in a one-gallon container is an unreasonable demand, and you will be disappointed. At minimum, full-size tomatoes need three-gallon pots, and bigger is always better. "Put your money into pots that are a little bigger and put your money into [quality] soil — you’ll have much better success," Gerber said.


What you need » In its simplest form, growing a successful container garden requires only six things: seeds or starts, suitable containers, consistent moisture, container soil, regular fertilization and full sun. Given these basic necessities, vegetables that are traditionally grown in the ground can be grown in pots instead, with few exceptions. And your choices aren’t restricted to "bush," "compact" or "determinate" vegetables, either. Although these varieties have been bred specifically to grow well in small spaces, full-size vegetables will also thrive in pots as long as they are treated well.

What constitutes a pot is really limited only by your imagination, but two things that all containers must have is good drainage and planting medium that holds moisture well.

These are non-negotiable. If soil becomes waterlogged and cannot drain freely, plants’ roots suffocate. However, giving plants too little water is not the better option: dehydrated, heat-stressed plants will expend their limited energy merely trying to stay alive, which will drastically reduce your potential harvest.

The key is to find balance, and the best test of that is your finger: push it about two inches into the soil. If your fingertip feels damp, your plant is wet enough. If the soil feels dry at this level, water your plant until water drips from the bottom of the pot.

Although many traditional pots come pre-drilled with at least one large hole, any container you choose can be given sufficient drainage with the right drill bit. After adding one or more ¾-inch holes to the bottom of your container, you can use a fine mesh, such as window screen cut to size, to line the pot. This will let excess water out while keeping precious container soil in.

Toil over soil » Having enough soil is critical to your success as a container gardener, as is choosing the right type. The term "potting soil" is a bit misleading, as most potting-soil mixes are soil-free. Strange as this sounds, soilless mixes are ideal for containers.

Katie Wagner, extension assistant professor of horticulture at USU, says containers should be filled "with a top-quality growing mix containing any of the following: sphagnum peat moss, perlite, vermiculite, coarse/sharp builders’ sand and fine bark." The ingredients in soilless potting mixes help the mixture to stay fluffy and retain moisture, which gives your plants’ roots plenty of breathing room. Soilless mixes are also sterile, which means they’ll lack any little nasties (soil-borne diseases, pest insects, etc.) lurking in your traditional garden soil, and they allow complete control over the nutrition you give to your plants. Because many mixes contain no added fertilizer, you can easily group plants that require the same types of nutrients in the same pot and feed them all at once.

Wagner suggests that container gardeners "add slow-release fertilizer at the time of planting, which will last approximately 2 months, or use a soluble fertilizer and apply it according to the label." Giving your plants the right kinds of fertilizer in the right quantities will directly impact the quality of the edibles they yield.

Gerber says that the most important thing to remember about container gardening is that this "small bit of garden" depends entirely on you. A pot-bound plant has no other consistent sources of water, nor can it seek out nutrition from surrounding soil like its in-ground kin. As its caregiver, you are the sole source of everything it needs to thrive.

To learn more: Contain Yourself!

Sunday, April 6, 2014

Growing Relationships - Part #2

Gardens create places of natural beauty and offer opportunities for strengthening friendships and teaching our children the law of the harvest. Growing a garden can help us become more self-reliant. But in the following account, members describe blessings they have received from gardening that go beyond food—blessings that have enriched their relationships with family, Church members, and friends.

Small Harvest, Great Friends
Elisa Freeman, Wyoming, USA

On one of my many trips to Deseret Industries while I was attending Brigham Young University, I found some large gardening pots for sale. I bought them on a whim and made plans to use them to plant a garden in my Provo, Utah, apartment complex. I knew nothing about gardens, except that a familiar Primary hymn—“The Prophet Said to Plant a Garden”—taught me to follow the prophet by planting one.

I worked in my garden in the afternoons when I knew people would be getting home from class or work. Before then, my apartment complex had not been very friendly, and I had almost moved out. My roommates and I decided to use the garden as a way not only to connect with the ward but also to connect people in our ward with one another. We made a conscious effort to speak with everyone who walked by as we gardened. By the end of the summer, I didn’t have much of a harvest—only a few tomatoes, carrots, and some basil. But what I really ended up with was a better sense of belonging and the knowledge that I had helped build ward unity. I formed some of my dearest friendships while working in that garden.

When I look back at that summer, I am so grateful I followed the directions of that Primary song. I learned that the Lord blesses us in unexpected ways when we follow the counsel of His prophets.

Growing Relationships

Friday, April 4, 2014

Sprouting Seeds in Recycled Items

As warm spring weather finally makes its way to Salt Lake, residents are flocking to their nearest garden centers, eagerly buying all kinds of vegetables, fruits and flowers to plant in their gardens. But is the timing right? Be mindful of what you are planting in your gardens this early; the last frost date for Salt Lake (according to the Farmers’ Almanac) is around May 1st, meaning there is still a 50% chance of frost before then which can damage your plants.

However, if you don’t think you can wait that long, and are itching to do something for your garden now, you can always start seeds indoors. Starting the warm season crops by seed right now will give you perfect seedlings to transplant to your garden when the time is right. Some seeds that do well in our high altitude climate include: tomato, cucumber, beans, squash and zucchini (to name just a few).

To get started all you need are your seeds, potting soil and a container to plant them in. Paper cups, egg cartons, plastic fruit holders and plastic jars all work great. You can upcycle just about anything in your house as long as you can keep it close to a sunny window and allow for drainage. This saves money and the environment by reusing stuff you already have.

To get started:

  • Find your container and make sure the bottom has holes for sufficient drainage. Place potting soil inside and water until it is damp.
  • Section off the soil into different planting areas for different types of seeds in necessary (a cut up mac n’ cheese or other cardboard box will do the trick).
  • Sow your seeds into the soil as directed on the package.
  • Place by a sunny window or keep outside during the day (as long as the temperature doesn’t dip too low) and water just enough to keep the soil damp. Avoid “puddling” which can drown the seeds.

You’d be surprised how easy and satisfying planting your own seeds can be. It’s also a great project to get the kids involved in. They may actually be willing to eat a vegetable if they helped plant and raise it from seed. (It’s always worth a try at least!)

For a tutorial on making a small greenhouse for your seeds, click here.


To learn more: Sprouting Seeds Using Recycled Items